Showing posts with label knitted toys. Show all posts

Wednesday, August 06, 2008

Knitted Sheep

Small in size. Big on texture. This knitted sheep has it all--cables, twists, seed stitch and bobbles.


It's a sampler of sorts and that's what I love about it.

Pattern: Petite Sheep by Melanie Elizondo
Purchased At: Black Sheep Wool Co. for $4.00
Yarn: Dalegarn Heilo
Colors: Natural and Charcoal Gray
Needles: US 3 DPNs
Size: Small (4" tall x 6" in length)

I'd recommend this project to knitters with intermediate skills. It's involved, but because it's small, it can be finished relatively quickly. I spent three evenings on the knitting and saved the sewing and stuffing for the daylight hours. The finishing, by the way, is minimal--only two seams along the belly.


This was the first project I've ever knit that has bobbles and I really loved making them.

I changed the way the legs are finished. Instead of using the recommended U-bolt in each leg, I use chenille covered wires (pipe cleaners)--bent into a U-shape--two for each set of legs. This gives the legs structure like the bolt, without being heavy and floppy.

If you want a copy of this pattern, you will need to contact Black Sheep Wool Company. I believe this pattern is exclusive to their shop.

To give you a size perspective, I took a picture of the sheep with a knitting/sheep themed gift my neighbor gave me for taking care of her house while she was out of town.

Cottage Creations Pattern Books, Wool Wash,
Sheep Towel, Sheep Tape Measure


She's not a knitter, but she knows what I like!

Wednesday, April 16, 2008

Crazy for Cupcakes

Or, just plain crazy. You decide. Some people get hooked on sock knitting or lace knitting, but I'm addicted to cupcake knitting.


I found a great new pattern. It's my favorite so far. The cake and the wrapper are knitted separately. I love that!


The pattern calls for Aran weight yarn, but I had the perfect chocolate colored yarn in DK weight, so I used that instead and adjusted the needle size to compensate.


These cupcakes are knitted flat and then seamed, but don't let that scare you away. Seaming is an important skill to master and these little cakes are perfect for practicing mattress stitch. They are large enough not to be fiddly, but small enough to sew up in a jiffy. It's easy, really--a piece o' cake.

Pattern: Cupcake by Bee
Yarn: Various Brands of Acrylic DK Weight
Colors: Chocolate Brown, Yellow, Pink, Purple, Cream
Needles: US 5 (3.75) Straights

Friday, April 11, 2008

Knitted Cupcake

Why knit a cupcake?


It's cute.
It's quick.
It's seamless.
It's just plain fun.

Pattern: Cupcake
Yarn: Bernat Cottontots
Cake Color: Pretty in Pink
Icing Color: Easter Parade
Cherry Color: Strawberry
Needles: US 5 (3.75mm) DPNs

Knit in the round from the bottom of the cake up to the cherry on top. There's not a single seam in the whole thing. The stuffing is added near the end and the last few rounds of knitting close the top.

You can make this into a paper weight, use it for a pin cushion, surprise a friend on her birthday or give it to a child for a toy.

Everything about this project was fun for me. It's nearly impossible not to smile when knitting a cupcake. Try it and see.

Friday, April 04, 2008

Twice As Nice

The good thing about knitting the same project back-to-back is you know exactly what to expect and how to improve upon your first attempt.


This time I was prepared to spend about half the total time on the finishing and because of that, I enjoyed the process much more. Expectation management is the key. That was what I was trying to express in my last post.

I don't want to scare anyone away from this project, because even though there are a lot of pieces to sew together, it's still a quick project to complete: 2-3 hours for knitting and 1-2 hours for finishing.


As for improvements, the second time around I used a woven stitch to graft the head to the body instead of a whip-stitch. It looks so much nicer this way that I went back and restitched the brown bear even though the ribbon hides the sloppiest of sewing.

I also changed the ears a bit. The instructions say to fold the ear in half and stitch. The direction of the fold is not specified. The first time I folded it in half to match a photo in the book. This time I folded it lengthwise which I think is a better shape. You just need to play around with it to find what you like best.


Teddy Bear
Source: Simple Knits for Cherished Babies by Erika Knight
Yarn: Lion Brand Fisherman's Wool
Color: 98 Natural
Needles: US 3
Size: About 8" tall from ear to toe

I think this bear would look great knitted from handspun and I have plenty of natural roving that would be perfect for it. So next time I need a baby gift, a spinning wheel may be involved.

Wednesday, April 02, 2008

A Toy for Baby

What was I thinking???


That's what I said to myself when I got to this point of the project.


But a spritz of water, a lot of steam, and a few pins later and all pieces were blocked into submission. What was once a mess was now manageable. And though the sewing up takes time, the result sure is cute.


Teddy Bear
Source: Simple Knits for Cherished Babies by Erika Knight
Yarn: Lion Brand Fisherman's Wool
Color: 126 Nature's Brown
Needles: US 3
Size: About 8" tall from ear to toe

The challenge of this project is not to become impatient with the amount of time it takes to sew up something so small. Start out knowing you won't just "whip it up" and you'll be fine.

The pattern isn't exactly clear about what method to use for sewing until you get to the arms. Use backstitch for the entire body for a neat and sturdy seam.

I hesitated momentarily before I cast on my next project. I almost talked myself out of it...but here I go again.


This time in a different color.

Friday, February 16, 2007

Baby Gift #3

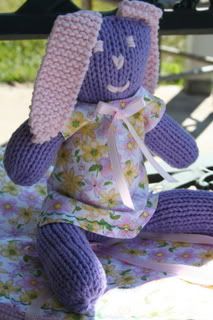
I decided to knit the rabbit from Natural Knits and sew a receiving blanket for this last baby gift.

Photobucket - Video and Image Hosting

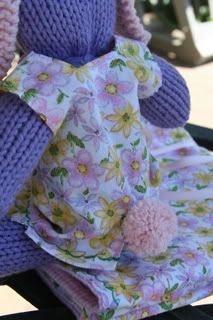
Though the stuffed animals in the book are not dressed and look cute that way, I thought the one I made looked unfinished and well...naked. So, I decided to attempt to sew a dress for it. Surprise, surprise, it actually worked!

I placed the knitted rabbit on a piece of paper and traced around the body with a pencil. Then, I drew a simple dress large enough to cover this shape. Using some left over fabric from the receiving blanket, I cut out the dress and somehow bungled my way through the rest of it. I don't have much experience in sewing clothes, so I know I went about most of the construction the hard way, but it worked and I'm happy with it.

Sewing this dress reminded me of the summer my grandmother made three wardrobes of Barbie Doll clothes for me and my two sisters. She made about six outfits for each of us. Unlike me, she is a very experienced seamstress. She drew out her patterns on brown paper grocery store sacks and constructed dresses, skirts, and blouses much prettier than store bought. My favorite was, of course, the evening gown. It was pale yellow satin, strapless, with a fitted bodice and a full skirt. Underneath was a petticoat of net that held the skirt out just right. Those Barbie clothes brought me many hours of fun and now that I've had a little taste of what it's like to sew something in a similar way, I appreciate them all the more. I doubt I have all them, but if I dig deep enough in the closet, I know I will find my old Barbie still dressed in my favorite yellow gown.

Photobucket - Video and Image Hosting

Pattern: Cat, Rabbit, and Teddy Bear from Natural Knits for Babies and Moms by Louisa Harding (dress pattern not included)
Yarn: Lion Brand Cotton-Ease
Colors (discontinued): Sugarplum, Strawberry Cream
Needles: US 6
Knitting and Sewing Time: 3 days

Monday, October 24, 2005

Donation Day

Image hosted by Photobucket.com
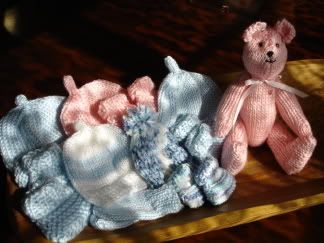
A few more items for The Preemie Project. No, I didn't make all of these this weekend. I worked on the hats a little at a time over the last month. Finished up the sets with some booties last week and worked on the bear (from The Knitted Teddy Bear) this weekend. This is the hat pattern I use when I want to make a hat quick. And this is the pattern for most of the booties I make. It takes me about 1.5 - 2 hours to make a hat and 1 hour for the booties. I don't consider myself to be a fast knitter, just a persistent one. Now to box it all up and get it to the post office. What will I work on next? I think I should finish the shawl I started a while back and maybe even knit a pair of socks. We'll see how long I can stay away from making baby things...not long I'm sure...I enjoy it too much.

Tuesday, October 04, 2005

City Life

Arrived in San Antonio late yesterday afternoon. We're staying here, a beautiful old hotel that some say is haunted. I've not run into any ghosts...yet. Having to get used to the sights and sounds of the city.
Image hosted by Photobucket.com
Nothing but large buildings for our view and the sound of loud city buses constantly in the background.

Over the weekend, I knit these...
Image hosted by Photobucket.com
which when sewn together became this cute teddy.
Image hosted by Photobucket.com
From the book The Knitted Teddy Bear. To be donated to The Preemie Project.

Monday, August 15, 2005

Bears and Blankets

Image hosted by Photobucket.com
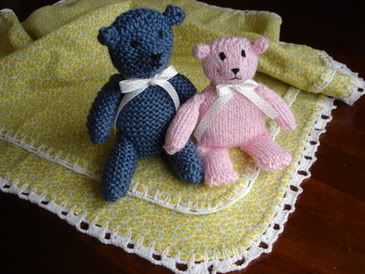
Well, I couldn't stop at just one bear. I had to try out these two little guys. They are made from the Beginner's Bear pattern in The Knitted Teddy Bear. Both are basically the same except that one is garter stitch and one is stockinette. What is so clever about this pattern is that the ears, head and body are all one piece. It starts out as a flat rectangle shape which you seam into a tube, add stuffing and tie lengths of yarn in just the right places to shape the ears, head and muzzle. Because there are fewer pieces to knit and seam, these bears go together a lot faster. That makes them perfect for The Preemie Project (TPP).

Speaking of TPP, our first donation is coming up soon, so I've been working hard to get a few receiving blankets made before the 8/24 mail-in date. You can see two of them in the picture. It's my first attempt at crocheting, so don't look too close. But, I think they turned out nice and I liked doing it. My daughter showed me the basic crochet stitches when she was here for a visit and that helped a lot. This week I plan to make some more blankets. Some may even involve a sewing machine. Not my specialty, but maybe I can figure it out. Now where is the book that tells me how to thread the machine?

Friday, August 12, 2005

The Knitted Teddy Bear

Image hosted by Photobucket.com
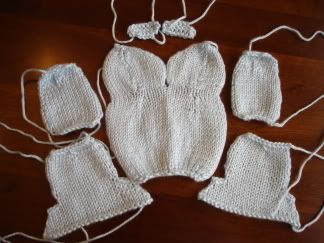
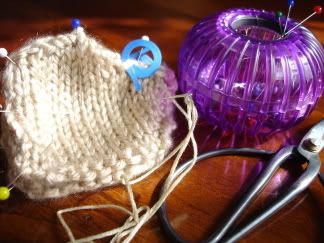
This bear had thirteen pieces to put together. I should have taken a picture of all of them, but here are two of the head pieces being sewn together. I used matching embroidery floss for most of the seaming which was done with a backstitch as the pattern suggested. It took a little time to put it all together, but I really like the way it turned out.
Image hosted by Photobucket.com
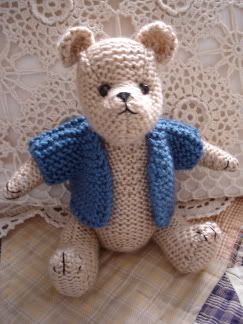
Meet Oliver from The Knitted Teddy Bear by Sandra Polley. He is made with Caron Simply Soft on size US3 needles. All that's left to do is add a couple of buttons to his jacket. If you are thinking of knitting a bear, I would highly recommend this book. It is well written and with about eighteen patterns to choose from, you are sure to find one you want to make.

Wednesday, August 10, 2005

Summer's Over

Image hosted by Photobucket.com
It's very quiet at home today. My husband is at work. My son started the first day of his senior year of high school. And, my daughter and her husband said good-bye a couple of hours ago after being here for a four day visit. We all had a great time together. There was knitting (the girls), computer games (the boys), Aquire and lots of food. It was fun! Wish we lived closer and were able to see each other more often. Summer break is over though and it's time to get into the school routine. But first, I think I'll knit a bear (from the book The Knitted Teddy Bear by Sandra Polley).

Wednesday, June 22, 2005

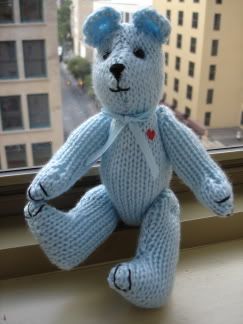
Teddy Bear

Image hosted by Photobucket.com
You can find the free pattern for this teddy bear here. I knit mine from Red Heart Casual Cot'n. This is a heavy worsted/bulky weight yarn with a lot of texture. I like the way this yarn gives the bear a homespun look. I used size 6 dpns and knit in stockinette stitch instead of the recommended garter stitch. And, when the pattern said to knit for 1?"(3 1/2 cm), I just knit until the proportion looked right. For me that was about 2 inches. This bear turned out to be 11 inches tall, but you could make it just about any size you want by adjusting the yarn and needles. It was fun to knit, but just know that you might have to play around with the pattern a little to get the look you want. The arms turned out a little long, but I was able to fix that when I did the seaming. Next time I will probably cast on fewer stitches for the arms. I originally thought I would give this to one of the new babies at church, but would it be wrong to keep it for myself? He's sitting on my desk now--sort of a knitting mascot.