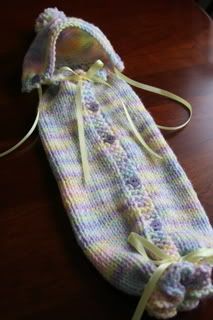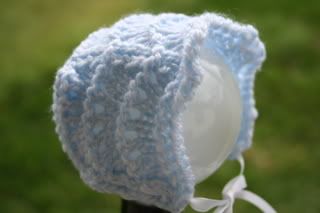
Pattern: Bonnet to Match Knit Burial Gown
Yarn: Bernat Softee Baby Sport D.K.
Needles: US 3 throughout
Size: 1-3 lbs
The size needles I used are a little small for this yarn, but I wanted the bonnet to be tiny. I normally prefer to use size 5 with this yarn.
After it was knitted, I found it difficult to know what size baby this bonnet would fit. It's easy to measure the circumference of a stocking cap and compare it to the measurements guideline, but a bonnet is different. I began to look around the house to find something to test it on. I discovered that a vanity light bulb measures 10 inches in circumference which is the size listed for a 1-3 pound baby. It fit nicely on the light bulb, so I'm hoping it will work as well on a baby.
I like this bonnet, but I began to think of ways to change it up. The design is a simple T-shape. The bottom of the T is folded to meet the top of the T and then sewn together (refer to the illustration on the pattern). It's easy to plug in different stitch patterns to each section to achieve a different look. The possibilities are unlimited.
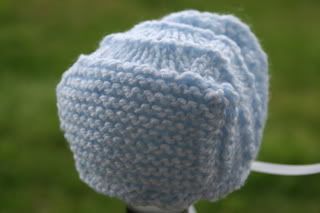
I knitted up two more bonnets using sport weight Red Heart Soft Baby and size US 3 needles. This is a lighter weight yarn and it worked much better with size 3 needles. The resulting bonnet is slightly smaller, but will still work for 1-3 pounds.
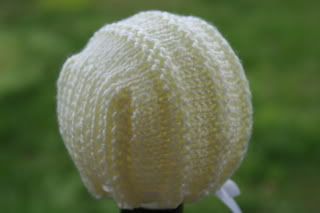
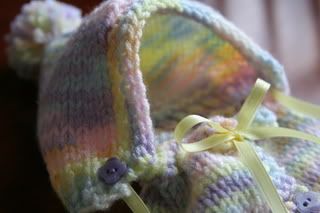
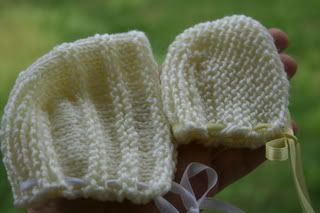
The yellow one turned out to be my favorite, though the detail didn't photograph well. It is stockinette stitch with rows of garter stitch for the front and 1x1 rib for the back.
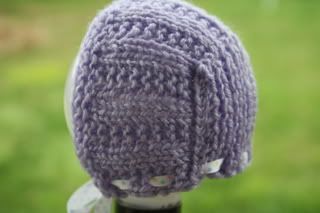
The lavender one is garter rib stitch on the front and 1x1 rib on the back. I like the ribbing in the back because I think it draws the bonnet in nicely, but any stitch would work.
Next, I experimented with reducing the number of cast on stitches to make a smaller size bonnet for a baby weighing less than one pound. I think this is the size the bonnets were requested for in the first place. You can see the difference in size in the picture below.
The stitch pattern for the tiny one is garter stitch for the front and my favorite 1x1 rib in the back.
I think I'll be making lots of bonnets in the future. The versatility of the pattern makes it fun to knit. For those of you who want to try it out, here is the formula I used based on the original pattern.
Yarn: Sport Weight Baby Yarn
Needles: US 3
Size: less than 1 lb (1-3 lbs)
*CO 31 (41) sts.
Work stitch pattern of your choice for 1.5 (2) inches.
Bind off 9 (12) sts. at the beginning of the next two rows.
Work remaining sts. in stitch pattern of your choice until it aligns with the front.
Bind off and sew together.
(I omitted the single crochet around the edge of the hat.)
Weave ribbon along the bottom edge of bonnet to use for tying under the chin.
* You may need to adjust the number of stitches cast on to work with the stitch pattern you select.